You can use the mail accounts you have opened on your site by installing them through Outlook 2016.
Video narration is at the bottom of our article.
Before starting the installation, you need to make sure that the password of the e-mail address is correct. If you do not remember your password, you can change it in the Mail Management >> SMTP Mail Settings section in your site administration panel.
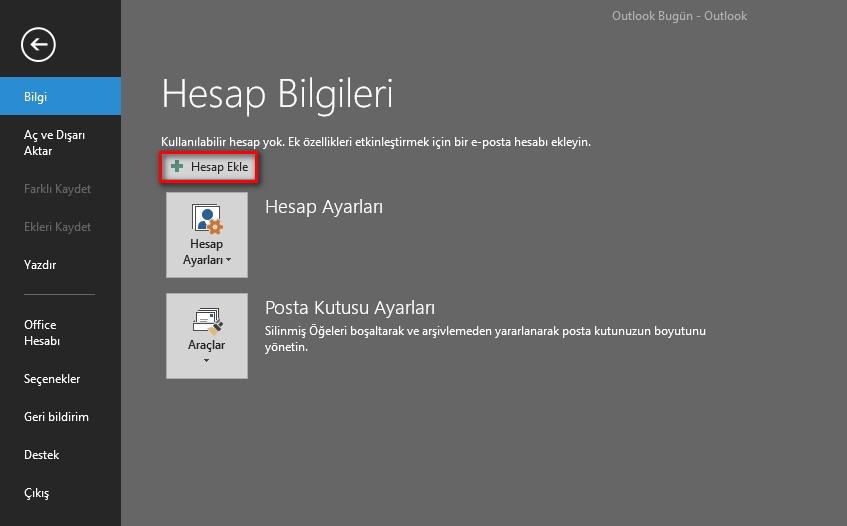
When you open the Outllok program, first click the Add account button from the File menu.
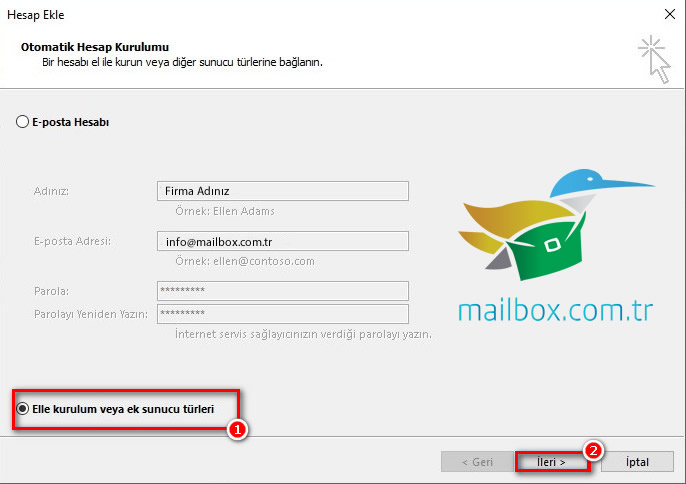
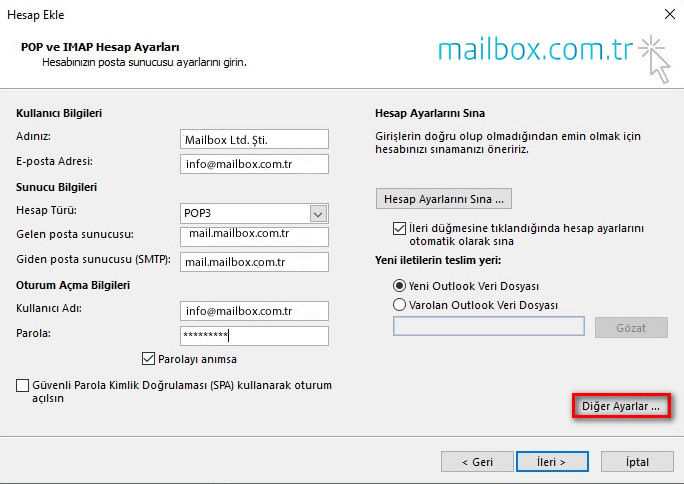
Write your name, e-mail address and e-mail password that you want to appear in e-mail submissions section.
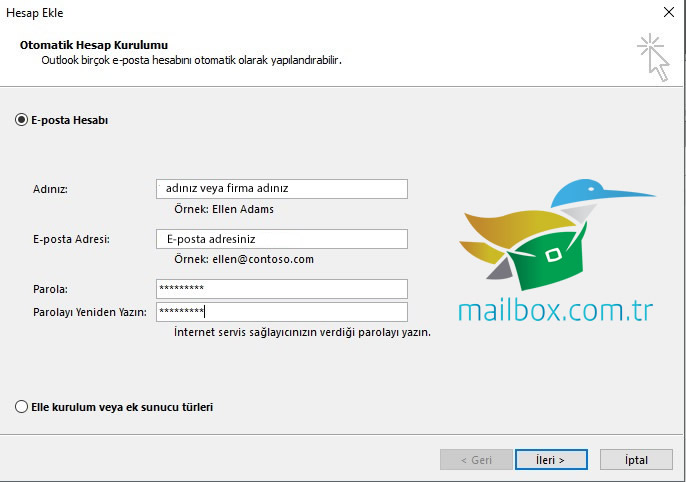
Then select the manual setup or additional server types option and click the next button.
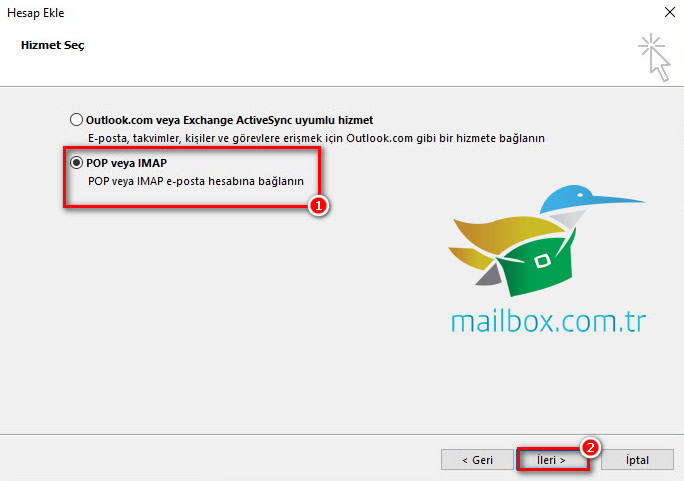
Select the Pop and Imap options and click the next button.
On the next screen, you should write the incoming and outgoing mail server information as mail.sitemore.com. For example, if we assume that your site address is www.mailbox.com.tr, mail.mailbox.com.tr should be written in these sections. In the login information section, the e-mail address and password should be written. Then click the Other Settings button.
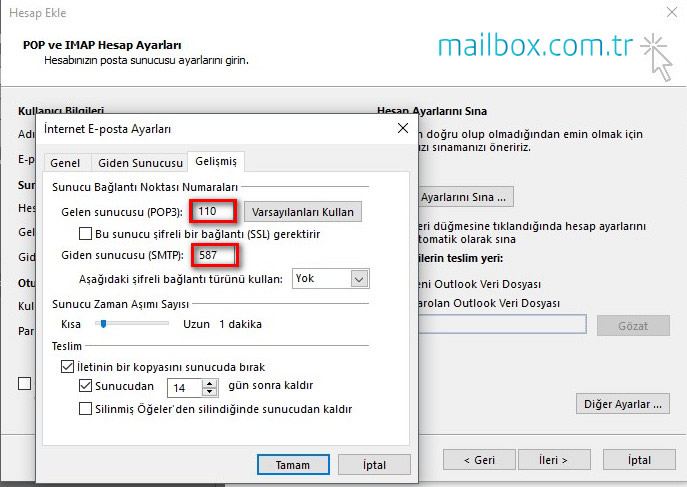
Click on the advanced tab in the other settings section. In this section, the incoming server should be 110 and the outgoing server should be 587.
If you check the option to leave a copy of the message on the server in the delivery section, your incoming mails will also be stored on webmail, and you can choose to delete them after a certain period of time. This option determines the length of time the e-mails will be deleted via webmail, not Outlook. Your e-mails on Outlook will not be deleted unless you do a manual deletion.
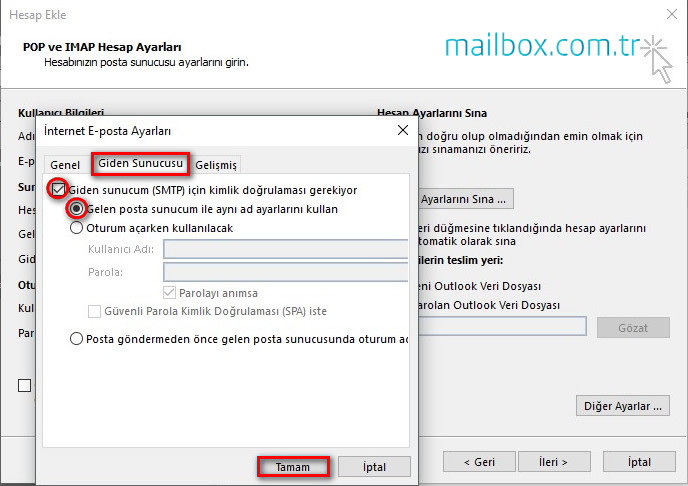
Click on the outgoing server tab. Check the "My outgoing server (SMTP) requires authentication" option and select the Use the same name settings as my incoming mail server option and click the OK button.
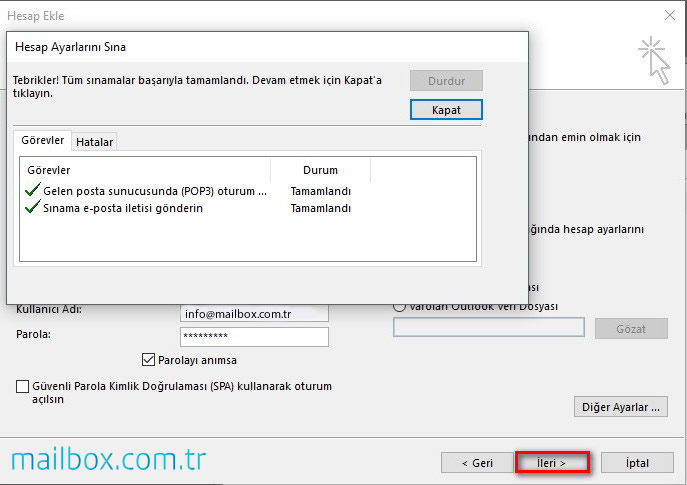
When you click the Next button, the account settings test screen will appear. When these actions are also seen as completed, you can close the window.
In the next step, you can click the add another account button to add another email account or click the Finish button to terminate the process.
Nov. 24, 2020, 4 p.m.