If you want to setup SMTP Mail on your WordPress website, you can follow the steps below.
1- Login to your WordPress admin panel. (siteadi.com/wp-admin.php)
2- Click on the “Plugins> Add New” tab on the left menu in the administration panel.
3- Continue by typing "WP SMTP Mail" in the search section at the top right. Upload the selected one of the plugins that will appear at the bottom. (When installing the plugin, pay attention to the update time, number of installations, ranking value and compatibility with your theme version.)
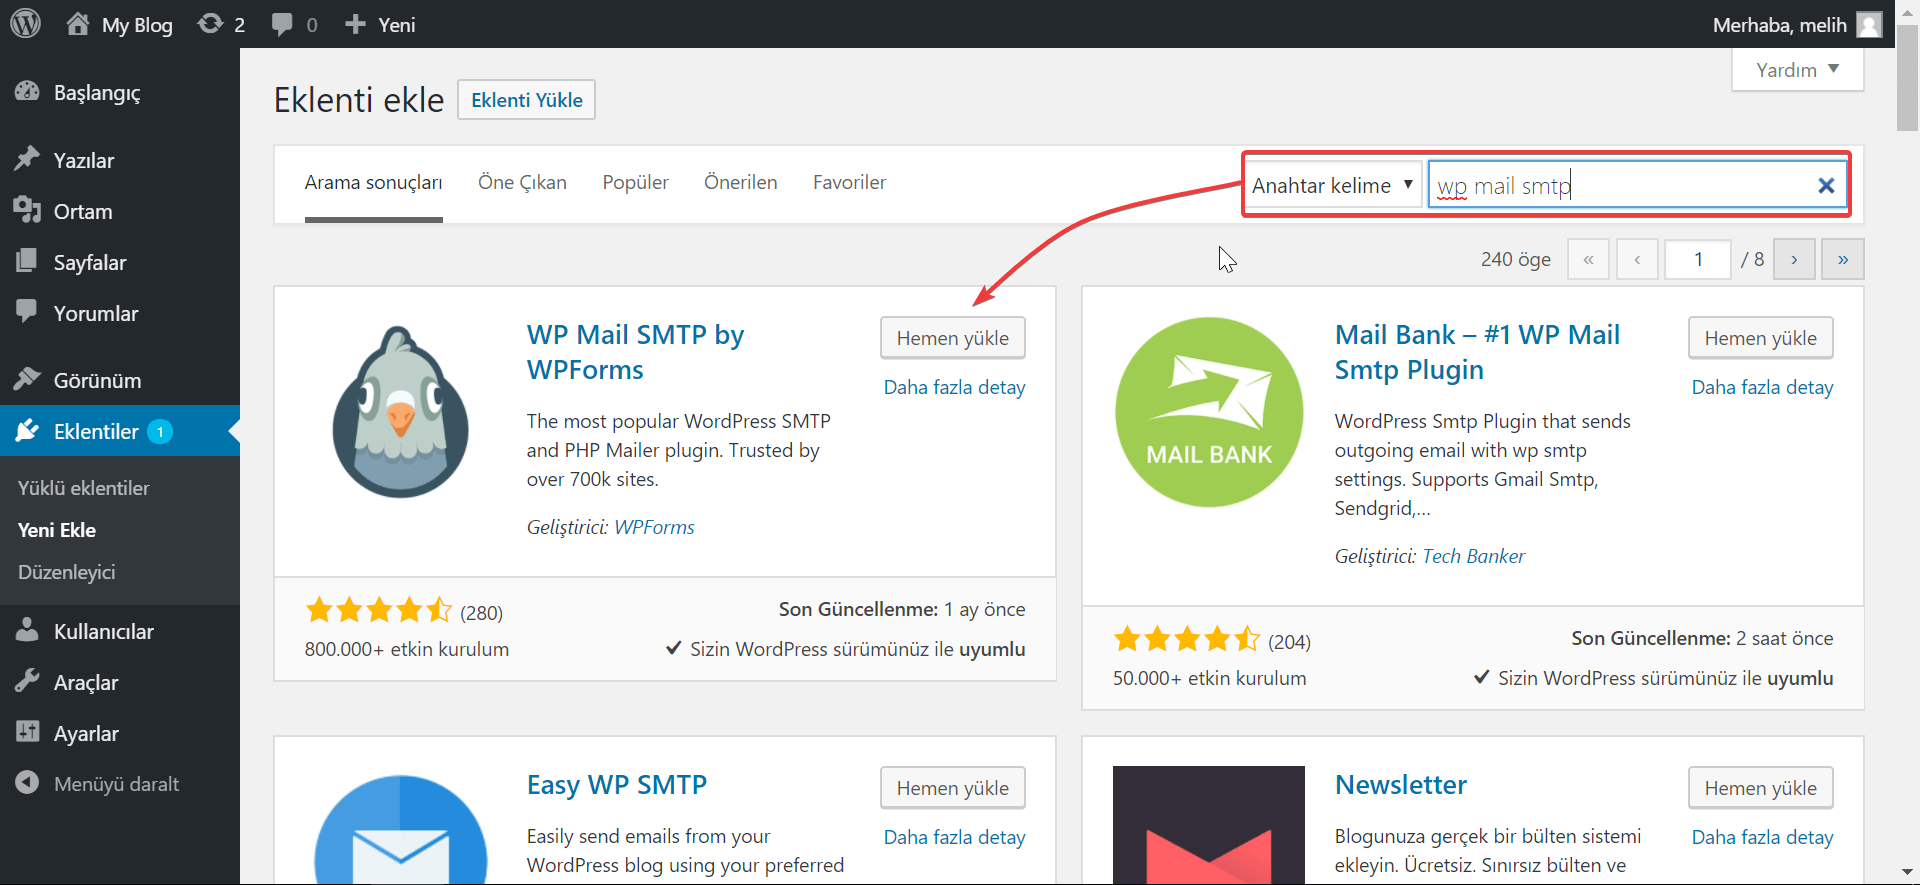
4- Start the installation process by saying “Install Now” and then the “Enable” button will be active. Once activated, you will be redirected to the "Installed Plugins" page. Click on the "Settings" tab under the "WP Mail SMTP" plugin.

5- In the settings section of the plugin, first fill in the "E-Mail" and "Outgoing Mail Name" boxes at the top.
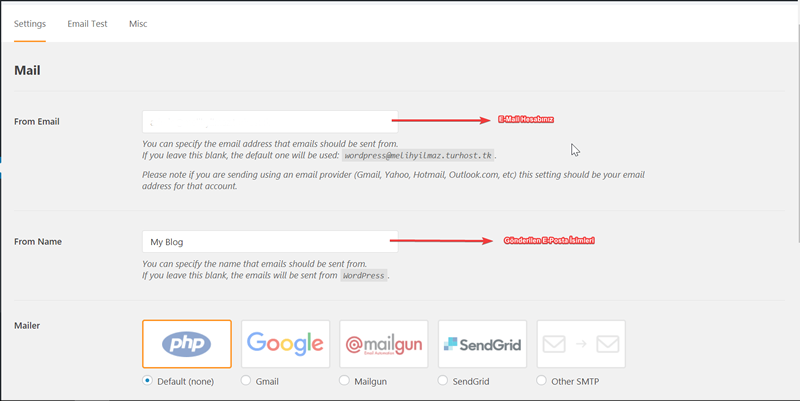
6- If you want to use the mail attachment as PHP, you can use it with default settings. Click on the Gmail box for Gmail settings.
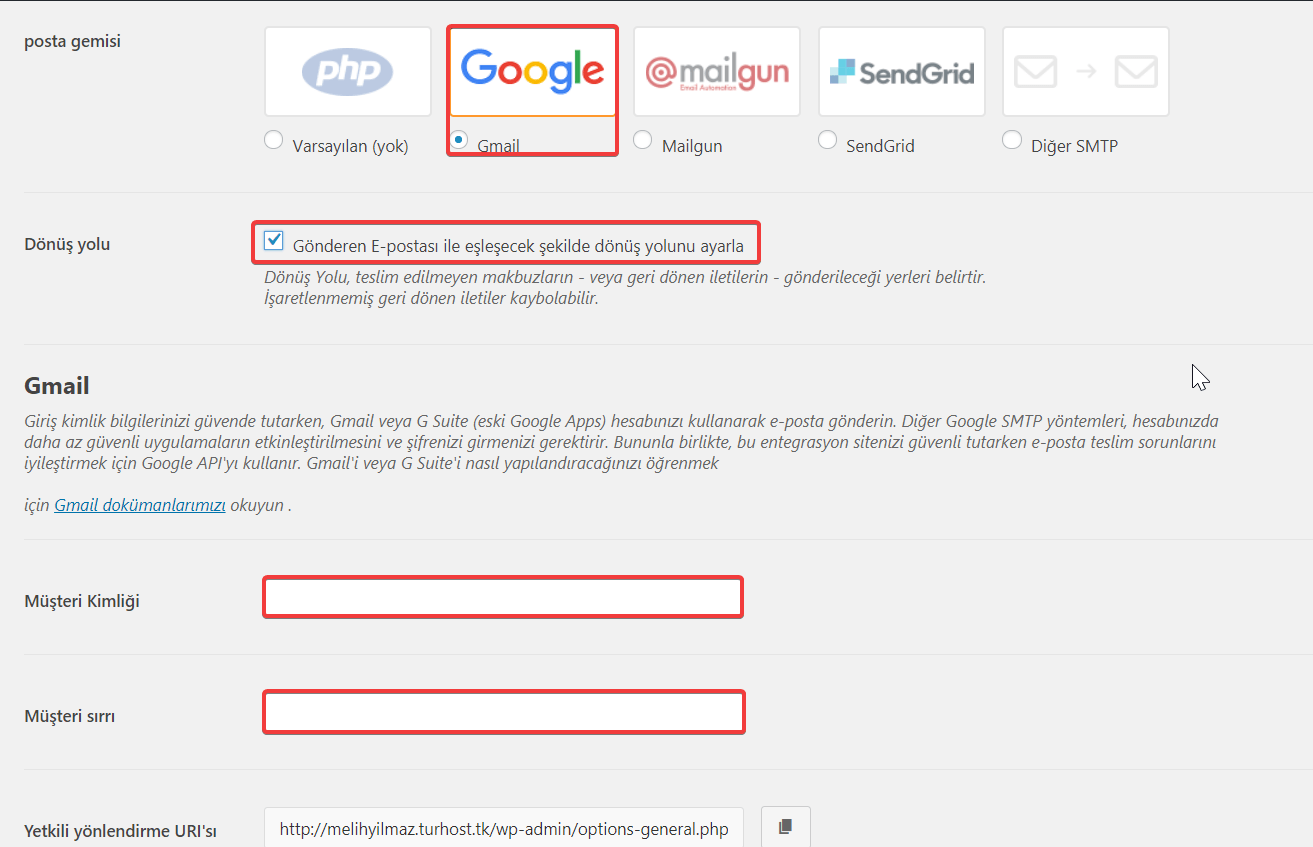
7- You can fill and activate the fields marked in red with the information you get from Gmail.
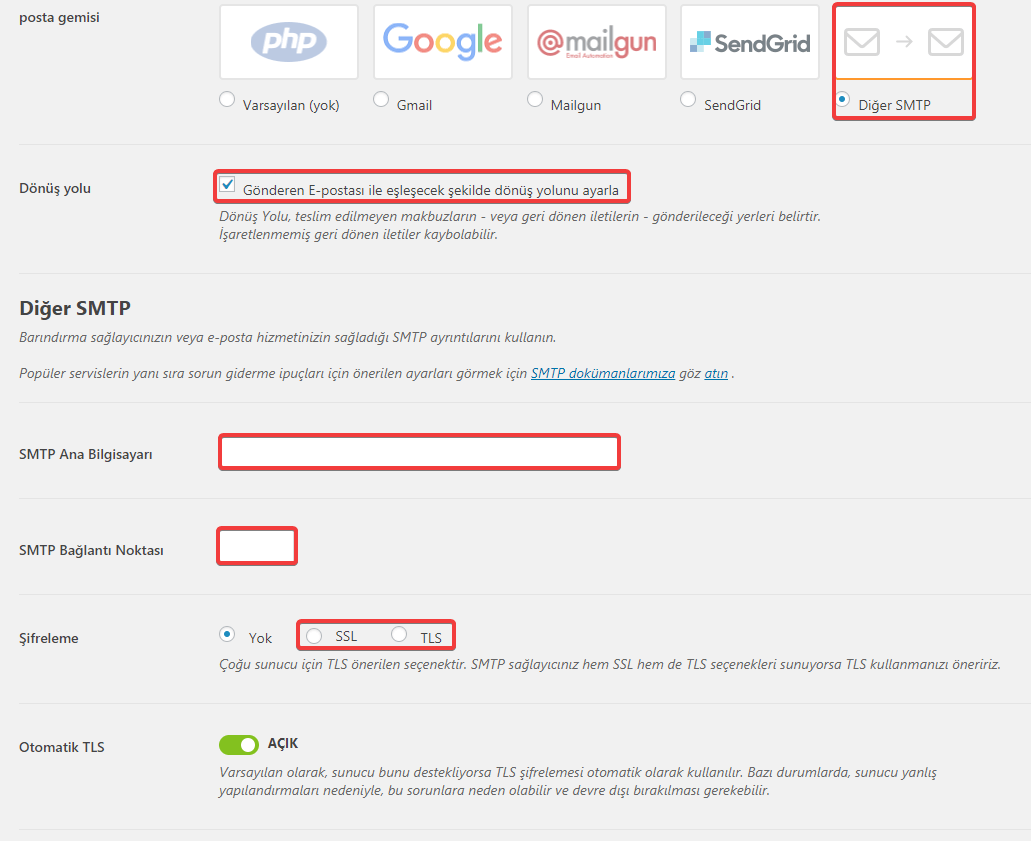
8- If you want to use it as SMTP, check the SMTP box. You can learn the necessary settings from your Customer Management Panel.
March 9, 2020, 3:02 p.m.